Setup Shipping Classes WooCommerce for Regulated Items
Learn to use shipping classes woocommerce for regulated products. Our guide covers setup, FFL best practices, and automating compliance with Ship Restrict.
Cody Y.
Updated on May 10, 2026
If you run a firearms store on WooCommerce, shipping usually feels manageable right up until it doesn't. One order has optics and a sling. Another has ammunition going to a state with extra rules. Another includes a handgun that can't go to a consumer address. The checkout looks normal. The legal risk isn't.
That's where most store owners get trapped. They treat shipping as a rate problem when it's really two separate problems. First, you need to price shipping correctly. Second, you need to stop orders that should never move in the first place.
Native WooCommerce gives you a strong starting point with shipping classes woocommerce. Used properly, they help you organize products by how they ship. Used strategically, they also become the product logic layer for a broader restriction system. That second part is where generic tutorials usually stop short.
The High Cost of Shipping Compliance Errors
The most expensive shipping mistake isn't always the one with the highest carrier bill. In regulated retail, significant damage starts when a store accepts an order that should have been blocked before payment. Then someone on staff has to review it manually, cancel it, contact the customer, issue a refund, and document what happened. If the order slips through, the problem gets worse.
Automate Shipping Compliance
Block orders to restricted states automatically. 3-day free trial.
Start Free Trial
A lot of merchants still manage this with memory, spreadsheets, staff notes, and checkout exceptions. That works for a while if the catalog is small and the order volume is light. It breaks fast when your store sells products that trigger different restrictions based on product type, destination, and customer eligibility at the same time.
Where most guides stop too early
Most shipping tutorials explain classes as a way to charge more for heavy or bulky items. That's useful, but it's incomplete for regulated goods. As noted in this review of the gap in common guidance on shipping classes for regulated stores, most guides don't address scenarios where one product must be restricted by multiple simultaneous conditions, such as a firearm that can ship only to licensed dealers in some places and not to consumers in others.
That gap matters because regulated shipping isn't one-dimensional. A product can be physically easy to ship and still legally restricted. It can be expensive to ship and legally unrestricted. If you mix those two ideas together without a system, staff end up making judgment calls at the worst possible moment, which is after the order has already been placed.
Practical rule: If your team is checking destination rules after checkout, your process is already too late.
What shipping classes actually solve
Shipping classes give you a clean way to group products by logistical behavior. That might mean handgun-related shipping treatment, ammunition handling, long-gun packaging, or unrestricted accessories. Once products are grouped consistently, you can attach shipping costs and method logic to those groups.
But that still doesn't enforce compliance on its own.
Think of shipping classes as the product-side structure. They tell WooCommerce what the item is for shipping purposes. Then a restriction system uses that structure to decide where that item can and can't go. That pattern is what keeps your shipping setup from becoming a pile of one-off exceptions.
The practical takeaway is simple. If you build your class structure well, everything downstream gets easier. Rates are easier to maintain. Staff training gets easier. Restriction rules become more predictable. And when regulations change, you're editing a system instead of chasing scattered product settings.
Building Your Compliance Foundation with Shipping Classes
WooCommerce shipping classes are product labels. They let you group items and apply different shipping rates through methods like Flat Rate or table-rate plugins. For regulated stores, that's more than a pricing feature. It's the first layer of operational control.
Free Shipping Compliance Audit
We'll review your WooCommerce store's shipping compliance for free.
For firearms retail, the cleanest setups classify products by logistical and regulatory profile, not by marketing category. “Sale Items” is a bad shipping class. “Handgun,” “Long Gun,” “Ammunition,” and “Accessories” are useful because they map to real shipping behavior.
Build classes around how the order must be handled
A strong class structure answers one question: what does fulfillment need to know before this item can ship?
For compliance-heavy retailers, shipping classes act as the base layer that geographic and product-type restrictions sit on top of, and advanced implementations often group products by weight tiers or special handling requirements to support carrier service decisions and damage reduction, as described in this guide on shipping classes by weight and compliance layering.
That matters because legal handling and physical handling often overlap. Ammunition may require a different operational path than an optic. A handgun may need a different service selection than a sling. If you classify those products correctly at the catalog level, your shipping logic starts with order instead of chaos.
A practical class model for an FFL store
You don't need a huge taxonomy. You need one that's clear.
- Handgun. Use this when the product requires handgun-specific shipping treatment in your workflow.
- Long Gun. This covers products with different dimensional and packaging behavior.
- Ammunition. Keep this separate because it usually follows its own fulfillment and restriction logic.
- Accessory. Use this for unrestricted products that move through standard parcel handling.
Some stores also need a composite class if a product has overlapping needs. That's because each WooCommerce product can have only one shipping class. You can't stack “Heavy” and “Fragile” on the same product and expect WooCommerce to interpret both. If you need both ideas represented, you define a combined class at the class level.
A shipping class should reflect fulfillment reality, not catalog aesthetics.
Keep the class logic simple enough to maintain
Many builds go sideways. The store owner tries to represent every possible exception inside the shipping class itself. That creates too many classes, vague names, and products assigned inconsistently.
A better approach is to keep shipping classes focused on broad handling behavior, then let restrictions do the legal filtering later. That keeps native WooCommerce useful instead of overloaded.
If you're weighing where the native feature ends and where restriction tooling needs to begin, this comparison of WooCommerce shipping classes vs restriction plugins lays out the dividing line clearly.
Creating and Assigning Your WooCommerce Shipping Classes
The setup itself is straightforward. The mistakes usually come from naming, assignment discipline, and bulk edits done too quickly.
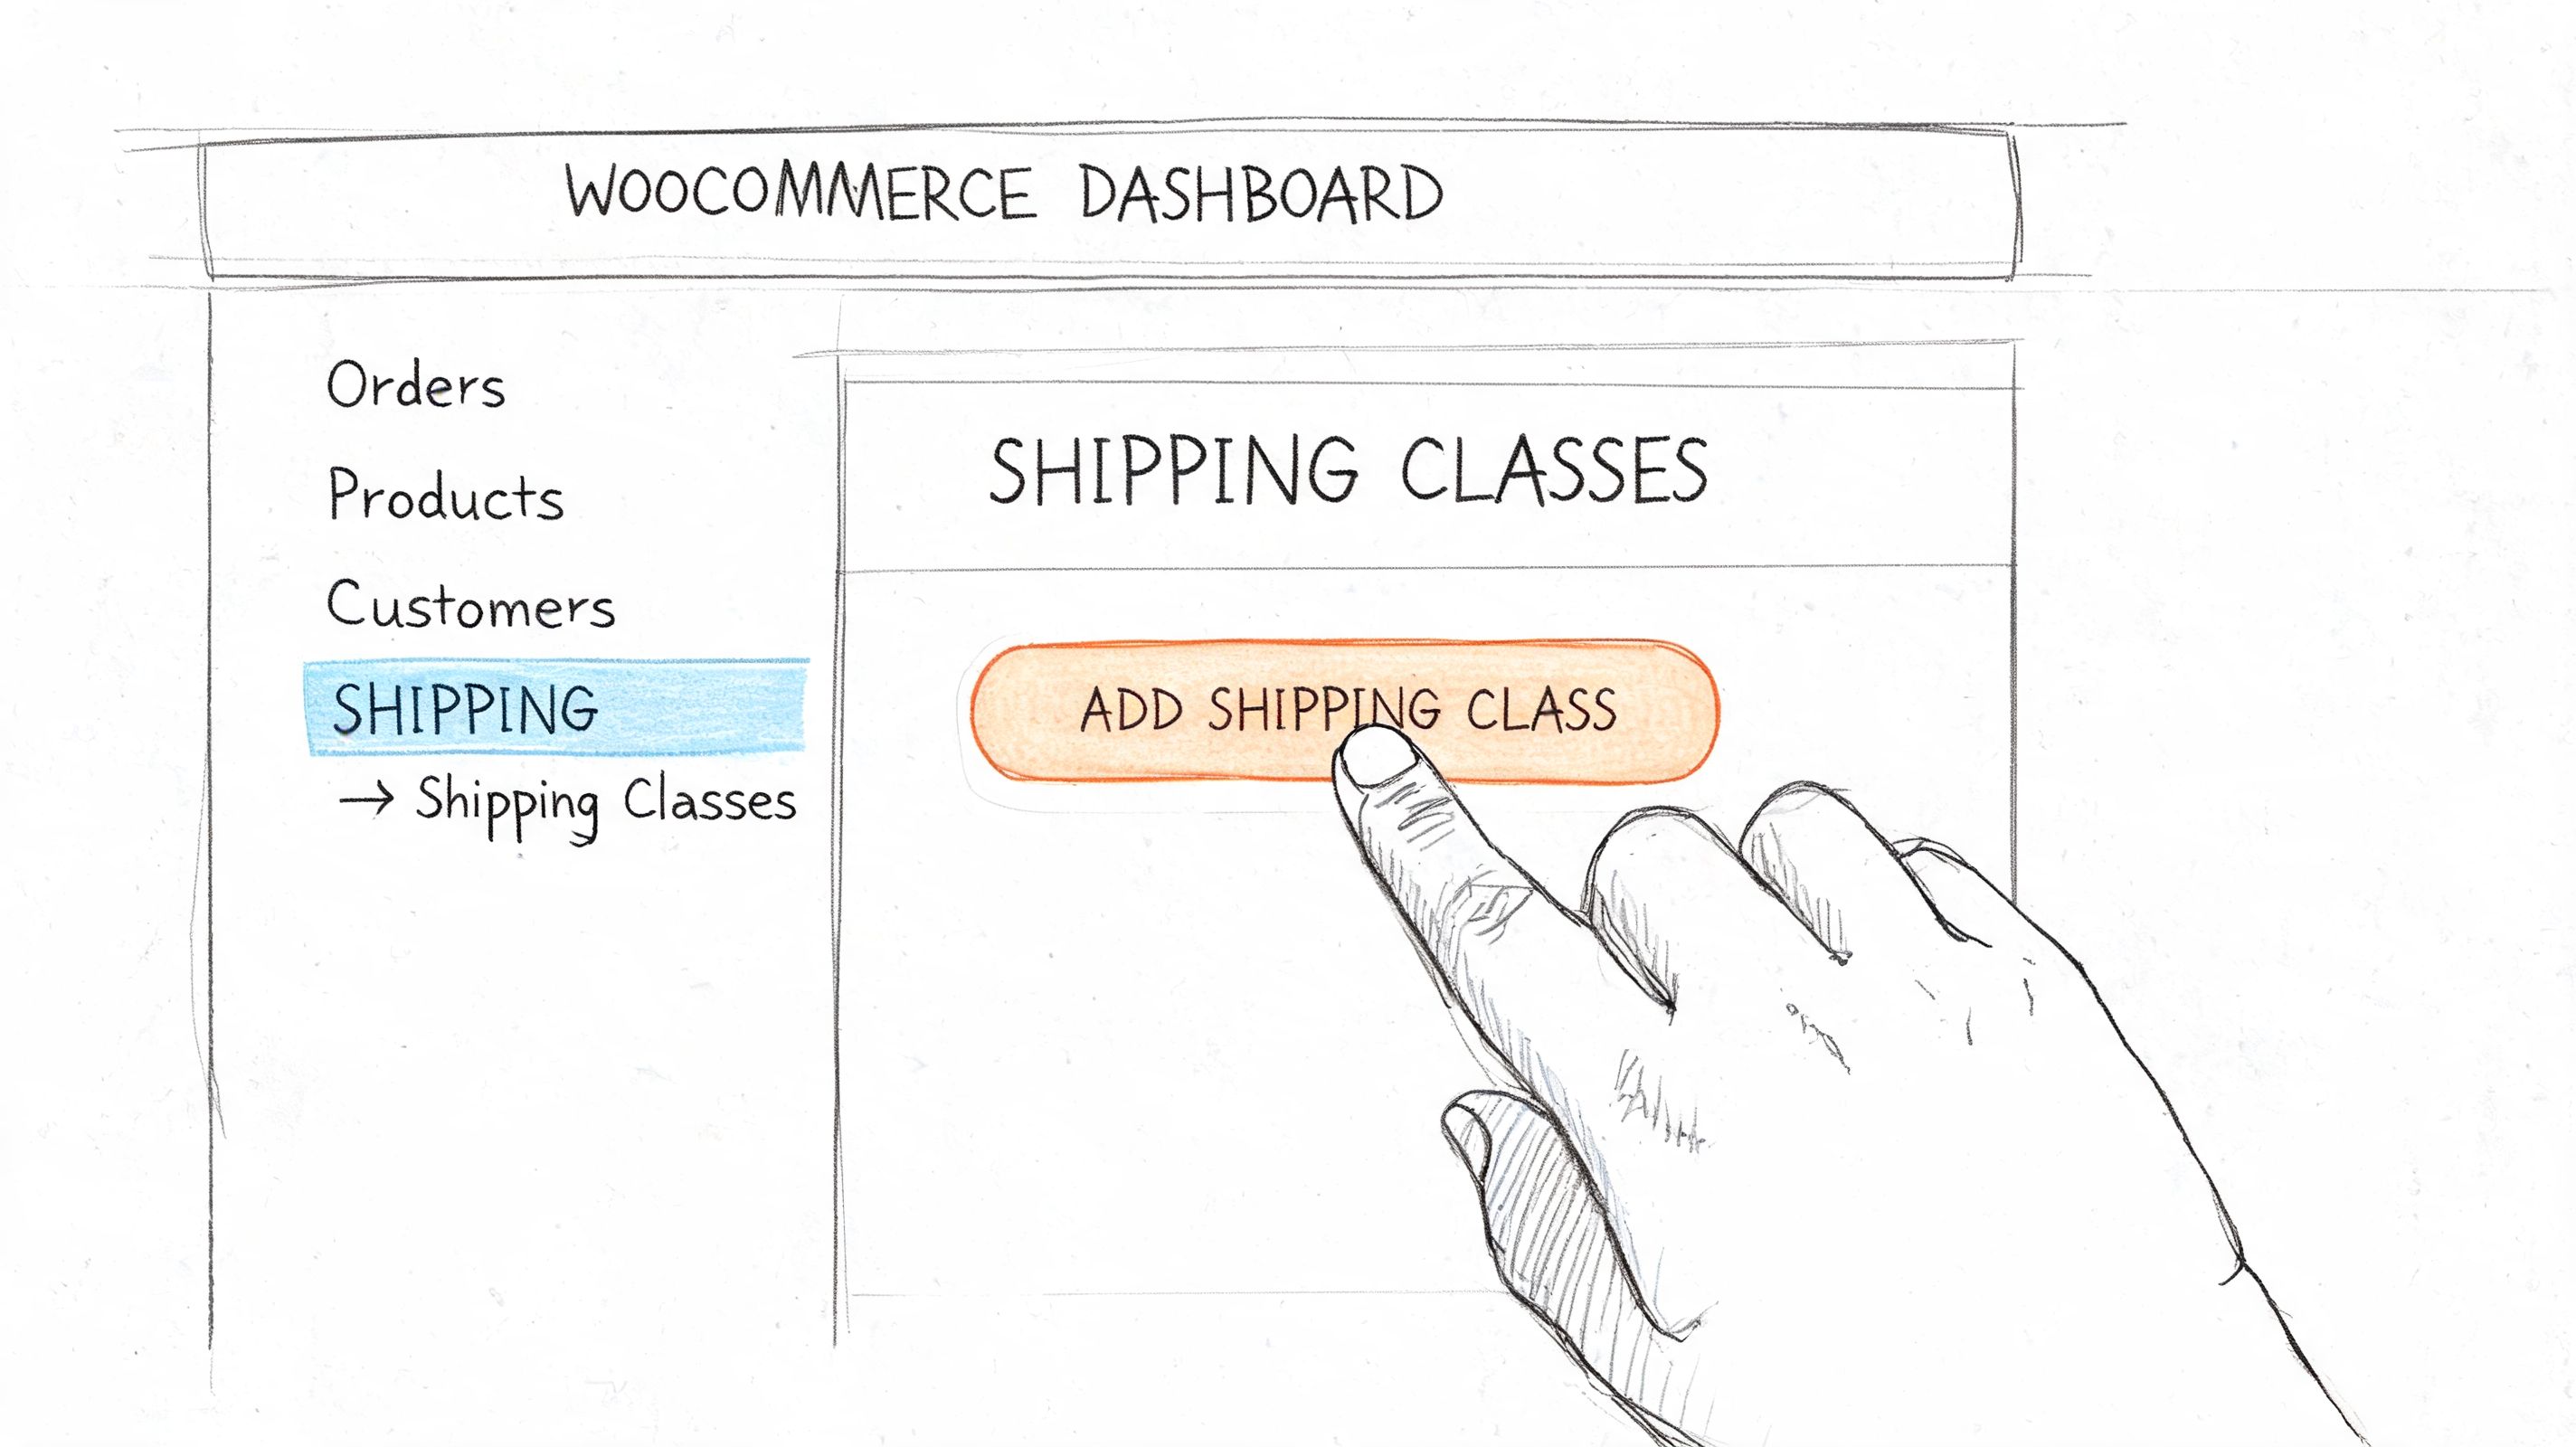
Start in WooCommerce → Settings → Shipping → Shipping Classes. Add each class with a plain internal name. Keep it boring and obvious. “Handgun Shipping” is better than “Serialized Compact Firearm Tier A” unless your entire team already uses that language consistently.
Name them for staff, not for customers
Customers don't see your shipping class names. Your staff does. That means the names should support catalog management.
Use a simple structure like this:
| Class name | Suggested slug | Internal use |
|---|---|---|
| Handgun Shipping | handgun | Firearms that follow handgun-specific shipping workflow |
| Long Gun Shipping | long-gun | Rifles and shotguns with different packaging behavior |
| Ammunition | ammunition | Ammo products with separate shipping handling |
| Accessories | accessories | Items that follow standard parcel flow |
The description field matters more than people think. Use it to document why the class exists, not just what it's called. A short note like “restricted fulfillment workflow” helps the next person understand the assignment without opening a policy document.
Assign products one at a time before you bulk edit
For a single product, open the product editor, go to Product Data → Shipping, and choose the shipping class from the dropdown. Save the product and move on.
For stores with an existing catalog, bulk edit is faster. It's also where most assignment errors happen. Bulk editing by category works well if your categories already align with shipping behavior. If they don't, stop and clean up the catalog first.
A good companion walkthrough for product-level control is this guide on restricting shipping by product in WooCommerce.
Use a quick validation pass after each batch
After a bulk edit, don't trust the update blindly. Spot-check products from each class.
Look for these common errors:
- Inherited category assumptions. A product lives in “Handguns” as a catalog category, but its fulfillment path is different.
- Variable product mismatch. The parent product looks correct, but a variation setup or duplicate product record was missed.
- Legacy products. Older listings often have no class assigned because they were created before shipping logic was formalized.
If your team needs a visual walkthrough inside the dashboard, this video covers the class setup flow:
<iframe width="100%" style="aspect-ratio: 16 / 9;" src="https://www.youtube.com/embed/Vyt5xIewlOs" frameborder="0" allow="autoplay; encrypted-media" allowfullscreen></iframe>The point of this stage isn't sophistication. It's consistency. If the product assignments are sloppy here, every shipping method and restriction rule built on top of them will behave unpredictably.
Configuring Rates with Shipping Zones and Methods
Shipping classes only start doing useful work after you attach them to rates inside the right zone. For regulated stores, that matters for two reasons. You need the charge to reflect real handling cost, and you need the structure to stay clean enough for a restriction layer to read later.
Set up zones around operational reality, not just geography on a map. If you ship the lower 48 one way, Alaska and Hawaii another way, and local pickup through a separate process, build zones that match those workflows. A zone should reflect how the order is fulfilled and priced.
Inside each zone, add the shipping method you use for class-based pricing. In most stores, that is Flat Rate. Then enter a cost for each class on that method.
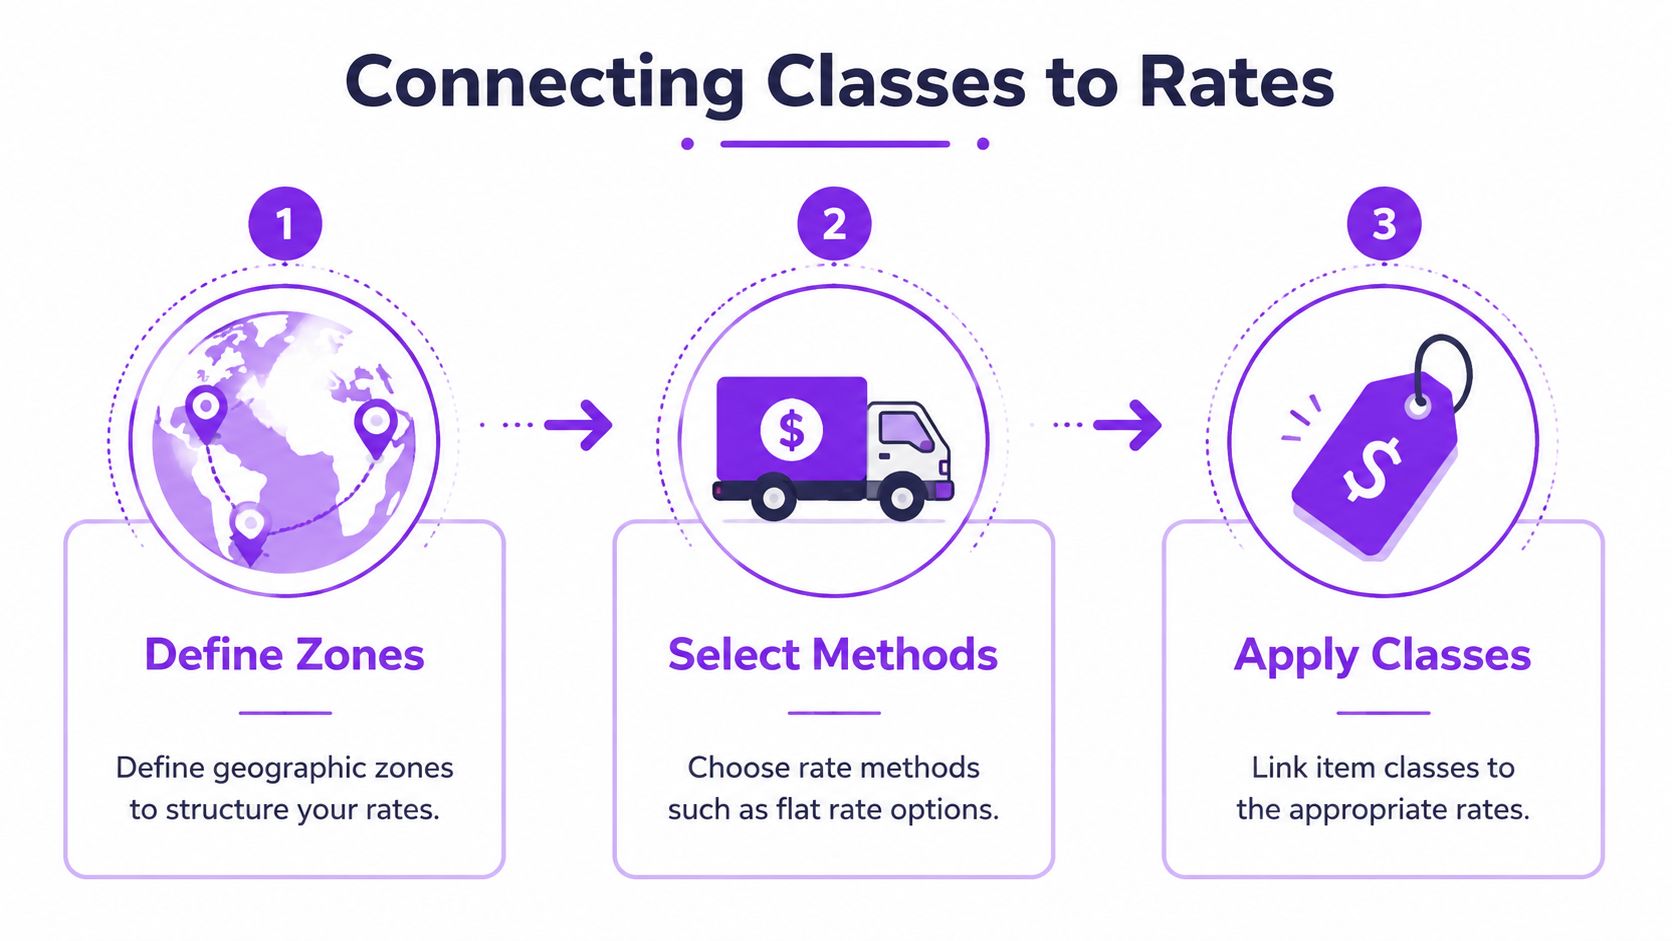
The practical order is simple:
- Build the zone for the destination group.
- Add the method that will carry class pricing.
- Set class costs inside that method.
- Review the fallback cost for products with no class assigned.
That last step gets missed all the time. If "no shipping class" has a low default charge, an unclassified regulated product can slip through checkout with the wrong rate. The legal rule still needs its own control layer, but bad rate setup creates confusion, support tickets, and margin loss before you even get to compliance.
Choose the calculation type on purpose
WooCommerce gives you two main calculation modes for Flat Rate. Per Class adds charges for each class in the cart. Per Order applies only the highest class cost present.
Here is the trade-off:
| Setting | What it does | Where it fits |
|---|---|---|
| Per Class | Adds shipping charges across classes in the same cart | Better when each product type adds separate packing, carrier, or handling cost |
| Per Order | Uses the highest class cost once | Better when you want mixed carts to feel more reasonable at checkout |
A simple example makes the difference clear. If a cart includes one accessory and one handgun, Per Class can recover both cost layers. Per Order usually produces a lower total and a friendlier checkout, but you may absorb more packing and adult-signature overhead than expected. I usually tell merchants to start by asking one question: does each additional class create a real incremental shipping cost, or are you mainly trying to avoid sticker shock?
Use rates for cost recovery, not legal control
This is the line that stores blur. Shipping zones and methods decide what the customer pays and which options appear. They do not determine whether the shipment is lawful for that destination.
That is why I treat native WooCommerce shipping as the logistics foundation. Then I layer restriction logic on top of it. If you want the setup pattern Ship Restrict expects, the Ship Restrict getting started documentation shows how to connect product signals like shipping classes to enforcement rules without turning your catalog into a patchwork of product-by-product exceptions.
Checkout presentation still matters. If customers are seeing multiple shipping methods and you want that step cleaner, these Elementor WooCommerce checkout options can help you present the choices more clearly.
Keep the jobs separate. Use zones and methods to price fulfillment correctly. Use your restriction system to block destinations, customer types, or product combinations that should never pass checkout.
Automating Compliance with Ship Restrict Integration
Shipping classes organize products. They do not decide whether a product may legally ship to a given address. That distinction is where a lot of regulated stores get exposed.
Native WooCommerce can apply the right rate to a handgun-class product, but it won't reliably stop an order just because the destination is a restricted city, county, state, or ZIP pattern for that product type. You need a second layer that reads the product logic and enforces location rules before the order gets through.
Use classes as triggers, not as the full rule
This is the clean pattern.
First, create your catalog classes around fulfillment behavior. Then use those classes as the product-side signal for restriction rules. In other words, the class tells the system what kind of item is in the cart. The restriction engine decides whether that item can ship to the destination and customer context involved.
For example, you might create a rule that checks for the handgun shipping class and then blocks shipping to specific jurisdictions in your compliance matrix. The class itself doesn't know the law. It provides the rule a dependable target.
Why this works better than product-by-product exceptions
Stores that try to manage compliance one SKU at a time create maintenance debt immediately. Every new product adds another decision. Every catalog import becomes risky. Every regulation change turns into a scavenger hunt.
When class-based logic drives restriction rules, your system behaves more predictably:
- New products inherit control faster when staff assign the correct class during setup.
- Rule changes stay centralized because you're editing restriction logic instead of opening dozens of products.
- Auditing is easier because product grouping and geographic restrictions are separated cleanly.
This is also the only practical way to scale if your store handles multiple regulated categories with different destination rules.
The implementation pattern
A workable build usually follows this sequence:
- Classify the catalog by fulfillment and regulatory profile.
- Map the restricted classes to the jurisdictions that require blocking.
- Test allowed and blocked addresses using real checkout scenarios.
- Review customer messaging so blocked orders explain the issue clearly.
For merchants who want the operational steps, the Ship Restrict getting started documentation shows how to configure location-based rules inside WooCommerce.
If your legal policy lives in a spreadsheet but your checkout doesn't enforce it, you don't have a policy. You have a hope.
The critical idea is this: shipping classes woocommerce give you the product structure. A restriction engine turns that structure into enforcement. Without both layers, you're either charging correctly without blocking risk, or blocking manually without a maintainable system.
Testing Your Setup and FFL Best Practices
A compliant shipping setup proves itself at checkout, under real conditions, with the wrong order blocked and the valid order allowed.
That matters more in regulated commerce than in ordinary retail. An FFL store can survive a slightly wrong rate for a day or two. It should not rely on staff to catch a prohibited destination after the order is placed. Shipping classes give you structure, but structure only matters if the checkout behavior matches your policy every time.
Test the full checkout path before launch
Use one product from each shipping class and run actual cart and checkout scenarios. Test addresses you know should pass, and test addresses you know should fail. Do this in the same combinations customers will create, not as isolated product checks inside the admin.
A practical test matrix should include:
- Single-class cart. Confirm the expected shipping method and rate appear.
- Mixed cart. Confirm your Per Class or Per Order logic produces the result you intended.
- Blocked destination. Confirm checkout stops the order before payment or completion, based on how your store is configured.
- Allowed destination. Confirm the same product can ship when the address fits your policy.
- Product with no class assigned. Confirm your fallback behavior is deliberate, not accidental.
Regulated stores frequently encounter costly errors. A product can have the right class, the right zone can exist, and the order can still slip through because the method priority, fallback rule, or restriction condition was set incorrectly.
If your operation includes dealer transfers, manual license review, or customer-specific handling outside WooCommerce, document that process separately. Checkout logic only enforces the rules you built.
Keep the class model small enough to audit
Stores get into trouble when shipping classes start reflecting every minor product difference. In practice, a smaller class structure is easier to assign, easier to test, and easier to review later.
For most regulated catalogs, this pattern holds up well:
| Class strategy | Likely outcome |
|---|---|
| 3 to 5 well-defined classes | Faster product setup, clearer rules, fewer assignment mistakes |
| Too many narrow classes | More edge cases, more review time, more opportunities for a bad shipment configuration |
I usually advise merchants to group products by shipping behavior first, then check whether that grouping also supports compliance enforcement. If a new class does not change rates, restriction logic, packaging, or handling, it probably does not need to exist.
Handle one-class-only products with the bigger risk in mind
WooCommerce allows one shipping class per product. That forces a decision when a product is both operationally awkward and legally sensitive.
Choose the class based on the mistake you can least afford. If the compliance consequence is more serious than the freight consequence, classify the product for restriction handling and solve the pricing detail elsewhere. If the freight handling difference drives fulfillment cost and the restriction layer can still identify the product correctly, classify it for shipping behavior.
That trade-off is normal. The goal is not perfect taxonomy. The goal is predictable enforcement.
Field advice: Pick the class that prevents the worse outcome. You can fix a shipping charge. You do not want to explain why an order to a restricted destination was accepted.
Use a second reviewer before go-live
The person who built the rules is usually the least likely to spot naming confusion, missing class assignments, or a fallback method that exposes too much. Have someone else run the test matrix and compare the result to your written shipping policy.
This review should answer four questions:
- Are all regulated products assigned to the right class?
- Do blocked states fail at checkout, not after the order is created?
- Do valid destinations still produce a usable shipping option?
- Do customer-facing messages explain the block clearly enough to reduce support tickets?
That final point gets missed. If checkout blocks an order but gives a vague error, support staff end up doing manual triage anyway.
Ship Restrict fits into this last testing step well because it lets you verify the enforcement layer against the shipping-class foundation you already built. The value is not just automation. It is consistency. Your catalog structure, your shipping logic, and your location rules start working as one system instead of three separate guesses.
If you're tired of relying on spreadsheets, memory, and post-order checks, Ship Restrict gives WooCommerce stores a way to enforce shipping restrictions by location and product logic before an order slips through. It fits the setup described here by turning a clean shipping-class structure into an automated compliance workflow.
Automate Shipping Compliance
Stop worrying about restricted states. Ship Restrict handles it automatically.

Cody Yurk
Founder and Lead Developer of ShipRestrict, helping e-commerce businesses navigate complex shipping regulations for regulated products. Ecommerce store owner turned developer.
Automate Shipping Compliance
- Block restricted states
- No more cancellations
- Set and forget
3-day free trial · Card required